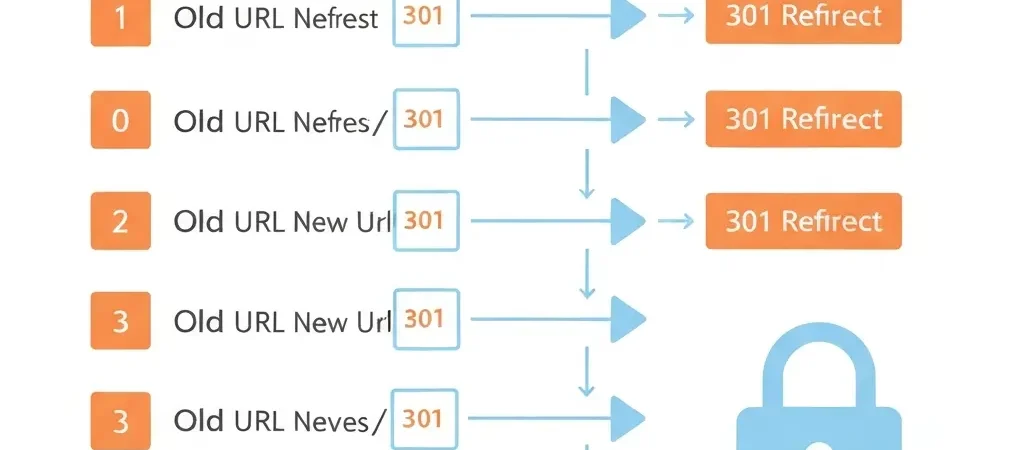
Website Migration SEO: The Complete Redirect Audit and Canonical Tag Guide for 2026
A website migration SEO failure is one of the fastest ways to lose organic traffic you spent years building. Done wrong, a migration can wipe out 30–50% of organic sessions within 30 days — and some sites never fully recover. Done right, a migration is an opportunity to consolidate authority, fix technical debt, and emerge with better rankings than you had before.
The difference between these two outcomes comes down to three technical disciplines: a thorough pre-migration audit, a complete and verified redirect map, and a canonical tag strategy that survives the transition. This guide covers all three, with checklists for domain changes, CMS platform switches, HTTPS migrations, and URL restructures.
Types of Website Migrations
Each migration type carries different SEO risk profiles. Understanding what you are doing before you start determines which checklist items are mandatory.
| Migration Type | SEO Risk | Critical Issues |
|---|---|---|
| Domain change | High | Full authority transfer, backlink signal latency |
| HTTP → HTTPS | Medium | Mixed content errors, canonical mismatches |
| CMS platform switch | High | URL structure changes, metadata migration |
| URL restructure | Medium-High | Internal link updates, redirect mapping |
| Site merger | Very High | Canonical conflicts, duplicate content management |
| Subdomain → root | Medium | Authority consolidation, crawl budget rebalancing |
Phase 1: Pre-Migration Audit
The pre-migration audit creates your baseline. Without it, you have no way to verify that the migration preserved (or improved) your organic performance. Complete every item in this phase before touching a single production URL.
Benchmark Data to Capture
- Organic sessions by page — export from Google Analytics for the last 12 months, segment by landing page
- Keyword rankings — export from Ahrefs, Semrush, or Google Search Console for all ranking keywords with position, URL, and search volume
- Crawl report — run Screaming Frog on the current site and export all 200 status URLs with metadata
- Backlink inventory — export all backlinks from Ahrefs or Semrush, sorted by referring domain authority
- Core Web Vitals baseline — document LCP, CLS, and INP scores for the top 20 landing pages
- Index coverage — export the index coverage report from Google Search Console to capture current crawl/index status
Identify High-Value URLs
Not all URLs are equal. Before building your redirect map, rank your existing URLs by value so you can prioritize redirect accuracy:
- Pages with significant organic traffic (top 20% generate 80%+ of sessions)
- Pages with referring backlinks from authoritative domains
- Pages that rank in positions 1–10 for keywords with commercial intent
- Pages with strong conversion rates regardless of traffic volume
Building a Complete URL Inventory
Pull URLs from multiple sources — no single source captures everything:
- Screaming Frog crawl (internal pages)
- Google Search Console URL report (indexed + crawled pages)
- Google Analytics top landing pages
- Sitemap.xml (all submitted URLs)
- Ahrefs Backlinks report (any URL receiving external links)
- Log file analysis (any URL receiving Googlebot visits)
Merge and deduplicate these lists. The result is your authoritative URL inventory — the foundation of your redirect map.
Phase 2: Redirect Mapping
A redirect map is a spreadsheet with three essential columns: old URL, new URL, and redirect status code. Every URL in your inventory must have an entry.
Redirect Types and When to Use Them
| Code | Type | Use Case | Authority Transfer |
|---|---|---|---|
| 301 | Permanent | URL permanently moved — use for all migration redirects | ~99% (confirmed by Google) |
| 302 | Temporary | Temporary redirect — maintenance mode, A/B testing | Not transferred |
| 307 | Temporary (strict) | Preserves HTTP method — rare in standard migrations | Not transferred |
| 308 | Permanent (strict) | Permanent, method-preserving — replaces 301 for POST | ~99% |
Handling URLs With No Direct Equivalent
Sometimes a page is deleted in the migration with no equivalent page at the new URL. For these:
- If the page had backlinks or traffic: Redirect to the closest topically relevant page on the new site
- If the page was low-value with no links: Let it return a proper 410 (Gone) to signal permanent removal — do not redirect to the homepage
- Never redirect to homepage as a catch-all: Google recognizes and ignores “soft 404” redirects where hundreds of URLs redirect to a single page that is not their logical equivalent
Canonical Tag Strategy for Migrations
Canonical tags tell search engines which URL is the authoritative version of a page. During migrations they serve two roles: preventing duplicate content during a phased rollout, and ensuring that post-launch all authority signals are consolidated on the new URLs.
Pre-Launch: Staging Environment
All pages on staging/development should be either:
- Behind a login or IP restriction with no public access, or
- Set to
noindexvia HTTP headers, with canonical tags pointing to the live (old) site URL
This prevents Google from indexing staging content and creating duplicate URL conflicts before you are ready to go live.
Post-Launch: New Site Canonical Requirements
Immediately after launch, verify every page on the new site:
- Canonical tag uses the new URL (
https://newdomain.com/page/) — not the old URL - Canonical tag uses the canonical (preferred) version of the URL — with or without trailing slash, consistently
- All canonical tags use
https://— neverhttp:// - Canonical tags use absolute URLs — never relative paths
- Self-referencing canonicals are present on every page (a page canonicalizes to itself when no duplicate exists)
Canonical vs Redirect: Which Takes Priority?
When a user or crawler visits an old URL and receives a 301 redirect, they land on the new URL. The canonical on the new URL confirms that the new URL is the authoritative version. Both signals work together — do not rely on just one. Sites that use canonical tags but no redirects will see the old URL remain in the index for months.
Sitemap and Robots.txt Best Practices
Sitemap Requirements Post-Launch
- Submit a fresh sitemap to Google Search Console within 24 hours of launch
- Sitemap must contain only new, final URLs — never include redirected or old URLs
- All sitemap URLs must return a 200 status code
- No noindexed URLs in the sitemap
- For large sites: use a sitemap index file pointing to multiple sitemap files segmented by content type or section
Robots.txt Checklist
- Confirm staging/preview environments are blocked in robots.txt on those environments
- Confirm the production robots.txt does not accidentally block Googlebot from the new URL structure
- Test robots.txt in Google Search Console’s robots.txt tester before and after launch
- Do not use robots.txt to block pages you want to be indexed — use noindex meta tags instead
Pre-Launch Checklist
Run through this checklist the day before and day of launch. Every item must be confirmed before you go live:
- Redirect map complete and tested in staging — every old URL returns a 301 to the correct new URL
- No redirect chains — verified by crawling with Screaming Frog in staging
- New site crawled in staging — zero broken internal links to new URLs
- All canonical tags point to new URLs (not staging or old domain)
- Robots.txt on new site does not block Googlebot
- XML sitemap updated with new URLs and submitted to Google Search Console
- Analytics tracking code transferred and verified firing on new site
- SSL certificate active and all pages load over HTTPS without mixed content warnings
- Old domain redirects are server-side 301s, not meta refresh
- Google Search Console property added for new domain and verified
- Change-of-address tool used in GSC (for domain migrations)
- Core Web Vitals tested on new site — LCP, CLS, INP scores confirmed
Phase 3: Post-Launch Monitoring
The first 30 days after a migration are the highest-risk period. Set up daily monitoring routines — not weekly.
Days 1–7: Immediate Verification
- Check Google Search Console daily for crawl errors, indexing drops, and Coverage report changes
- Verify that Googlebot is crawling the new URLs (GSC Coverage report and log file analysis)
- Confirm that key pages are returning 200 status codes — not 404s or unintentional redirects
- Check organic sessions in Google Analytics — compare to same period in prior week and prior year
- Monitor rankings for your 50 most valuable keywords
Days 8–30: Traffic and Ranking Recovery
- A 10–20% temporary traffic dip is normal in the first 2 weeks as Google recrawls and reindexes
- If dip exceeds 30% by day 14, escalate to a full technical audit — do not wait
- Re-check redirect map: run Screaming Frog on the live new site to catch any 404s that emerged post-launch
- Submit the URL Inspection tool for your 10 highest-value pages to force faster re-crawl
- Contact high-authority referring domains to update backlinks from old URLs to new URLs — this accelerates authority signal transfer
Five Mistakes That Tank Rankings
- Launching without a complete redirect map. The most common cause of catastrophic traffic loss. URLs without redirects return 404s, backlinks become worthless, and authority evaporates.
- Redirect chains carried forward. Existing redirect chains from previous URL changes are not cleaned up before the new migration adds another hop. Always audit and flatten all chains before go-live.
- Staging environment indexed. Forgetting to block staging during development results in Google indexing duplicate content at staging URLs before launch, creating canonical conflicts that persist for weeks.
- Canonical tags not updated post-launch. Pages still carrying canonical tags pointing to old domain URLs after launch actively suppress the new URL in the index — the opposite of what you want.
- Treating migration as a content freeze. Pausing content publication for 2–4 weeks around a migration removes a freshness signal precisely when you need all positive signals to support the new domain. Maintain or increase publishing cadence.
Maintaining Content Velocity Through a Migration
The technical migration work absorbs enormous bandwidth. Most content teams reduce or halt publishing during a migration window — and this compounds the organic traffic dip. Google uses content freshness as a ranking signal, and a multi-week publishing gap in a competitive niche is visible in rankings.
The solution is to automate content production so it continues independently of the migration project. An automated content pipeline can maintain your publishing cadence while your engineering and SEO teams focus on the migration itself. You can also use this period to pre-publish a batch of high-value content to the new URL structure, giving Google strong positive signals from the first week the new domain is live.
From an SEO content strategy perspective, a migration is also an opportunity to restructure your content architecture — consolidating thin pages, upgrading pillar content, and eliminating cannibalizing URLs. Done deliberately, this restructuring lifts organic performance above pre-migration baselines within 60–90 days.
For teams managing migrations at scale, programmatic SEO approaches can help automate URL mapping, canonical tag generation, and content migration across large page inventories. You can also reference the complete AI SEO tooling guide to understand which tools reduce manual work in the technical audit phases.
Ready to maintain publishing velocity through your next migration? Authenova’s automated content platform keeps your content calendar running on autopilot — so technical work and content production never compete for the same resources.
Frequently Asked Questions
How long does it take to recover rankings after a website migration?
For a well-executed migration with complete redirects and proper canonical tags, most sites see 90%+ traffic recovery within 60–90 days. High-authority sites (DA 50+) with clean implementations often recover faster — sometimes within 2–4 weeks. Sites that execute migrations poorly (missing redirects, canonical errors, staging indexed) can take 6–12 months to recover, and some never fully do. The quality of pre-migration planning directly determines recovery speed.
Should I use 301 or 302 redirects for a website migration?
Always use 301 (permanent) redirects for website migrations. Google has confirmed that 301 redirects transfer essentially all link equity (PageRank) to the destination URL. A 302 (temporary) redirect signals to Google that the move is not permanent — which means Google may continue indexing the old URL and will not transfer authority to the new one. The only time to use 302 during a migration is for temporary staging previews or short-term testing environments.
How do I use the Google Search Console change-of-address tool?
The Change of Address tool in Google Search Console is only for domain name migrations (e.g., olddomain.com → newdomain.com). You must have both properties verified in GSC. Navigate to Settings in the old property, click Change of Address, select the new property from the dropdown, and submit. This tool gives Google a direct signal to transfer authority and update its index faster than relying on 301 redirects alone. For same-domain URL restructures, the tool is not applicable — rely on redirects and sitemap submissions.
What is a redirect audit and when should I run one?
A redirect audit is a systematic check of all redirect rules on your site to identify: chains (A → B → C), loops (A → B → A), redirects to noindexed pages, and broken destinations (redirecting to 404s). Run a redirect audit before every migration, every time you do a major URL restructure, and as part of your quarterly technical SEO audit. Use Screaming Frog in “Always Follow Redirects” mode to crawl your site and export all redirect chains. Flatten every chain so each old URL points directly to its final destination in a single hop.
How long should I keep redirects in place after a migration?
Keep redirects in place indefinitely for all URLs that had significant backlinks or organic traffic. There is no technical benefit to removing them — a modern server handles hundreds of thousands of redirect rules with negligible performance impact. Removing redirects before all backlink-bearing old URLs have been updated by referring sites means those external links become broken, and you lose any remaining authority they carry. For truly low-value URLs with no external links and no traffic history, redirects can be safely removed after 12 months.
What is the difference between a canonical tag and a redirect?
A canonical tag is a signal — it tells Google which URL you prefer to be indexed, but both URLs remain accessible. A 301 redirect is a directive — when a user or crawler requests the old URL, they are sent to the new URL and the old one is no longer accessible. During migrations you need both: the redirect ensures old URLs are not accessible and link equity transfers, while the canonical on the new URL confirms it is the authoritative version. Using canonicals alone (without redirects) means users who follow old links land on pages that still exist but are marked as duplicates — this is not a migration, it is just a canonical consolidation.
Keep Publishing Through Every Migration With Authenova
The biggest SEO risk during a migration is not technical — it is the content publishing pause that removes your freshness signals precisely when you need every positive signal working in your favor. Authenova automates content production on a scheduled cadence so your blog, knowledge base, and landing pages keep publishing through any migration event.